SMD Soldering - Part II
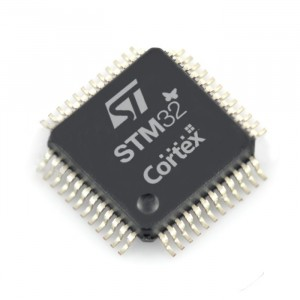
Integrated Circuit with visible lead pins

Soldering of an integrated circuit with fine pitch lead pins (e.g. lqfp64 STM32 package):
Step 1: Align device with landing pads
- Deposit tin on a pad at a corner of your choice
- Position (and reposition) the device with hand or twizzers until you're (very) happy with the alignment
- Carefully solder opposite corner, checking that the device does not move in the process
- Make sure that the device is perfectly laid down the PCB. Apply gentle pressure on top of the package while reflowing one corner after another if you have doubts
Step 2: As long as only 2 pins have been soldered, you may slightly refine position and orientation by heating one of the soldered corner pin and by applying gentle force on the device. Be very careful, pins are very easy to twist...
Step 3: Solder all leads with fine tip iron. Generously use soldering flux but don't bother if you leave shortcuts between adjacent pins. We'll fix that later. GND pins are harder to solder due to ground plane acting as heat sink. I'm using a rather high temperature soldering iron (400°C).
Isn't this amazing? Well, flux helps a lot actually...
Nevertheless, you may not obtain such result first time. If your soldering skills are limited, or if you shiver, you might obtain something closer to the examples below. Do not despair... there are solutions to fix even an ugly soldering job. See below!
Step 4: Remove tin excess that may bridge adjacent pins using desoldering braid. Doing so, you will most likely mop up too much tin. If so, just try and solder again!
Step 5: Although this is not mandatory, you may want to even out your soldering job by using an hot air gun to reflow solder. Use generous amount of soldering flux to keep tin very fluid and avoid oxidation. On the hot air station, dial a gentle flow with a rather high temperature (400°C here).
Amazing again! It looks very professional now!
Step 6: Remove flux using isopropyl alcohol cleaner and dedicated foam tip:
Step 7: Final inspection. Make sure all bridges have been removed, and all pins have been correctly soldered. That's truly important before powering on the device. Would you like to burn the device and start over the whole thing? I guess not...
- Log in to post comments
