
1.9. Importing & Cloning projects
This tutorial proposes a method that can be used to duplicate projects. This is very useful for using existing projects or template projects as a base for a new application.
Although a simple copy/paste from the project explorer seems to work, I've found that many paths are not updated and still refer to the source project. I acknowledge that the method proposed below does not appear as the most convenient way to create duplicates, but I've been doing this for years and it seems to be robust enough to create perfectly independent clone projects.
You will need a separate text editor with good a Search/Replace tool. I suggest getting notepad++, but any other you like will do.
Cloning an existing project mostly consists in
- Duplicating the existing project folder
- Performing some manual edit in project configuration files to change its name
- Importing the new project into the workspace
Note that step 3 alone is very useful for importing projects that have been created elsewhere (another computer, another workspace, another developer, ...).
In this tutorial, we will duplicate the blink3 project as a new my_project project.
1. Step #1 : Duplicate the source folder
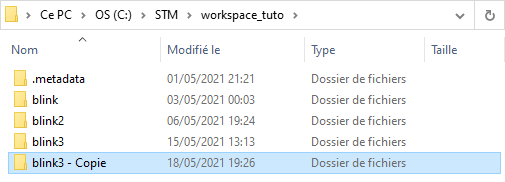
Using your OS explorer, navigate into your workspace folder and copy/paste the blink3 folder:
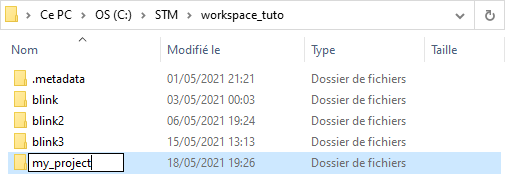
Rename that folder with the new project name my_project:
2. Step #2 : Clean & edit new project configuration files
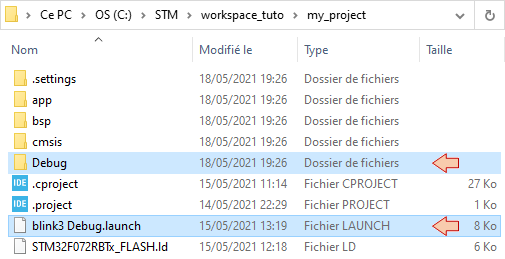
Now open the my_project folder. Delete the Debug folder (these have been produced during build) and the debug/launch configuration file:
Then, open both .project and .cproject files into a text editor (preferably notepad++).
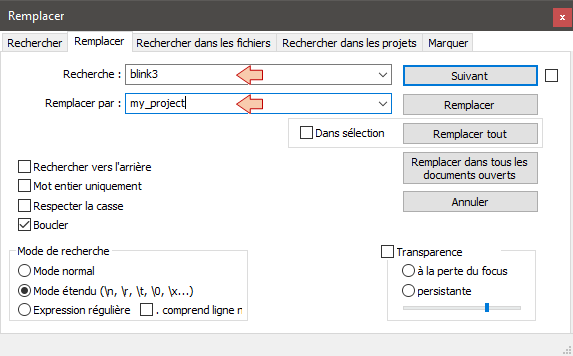
Search and Replace every occurrence of the old name blink3 with the new name my_project.
- In the .project file, there is usually only one occurrence within the <name> tag:

- In the .cproject file, there are several occurrences. In this example, 3 replacements were performed, but you may have more…


Save and close both .project and .cproject files. The new project is ready for import within STM32CubeIDE.
3. Step #3 : Import an existing project into STM32CubeIDE
Start STM32CubeIDE within the working workspace and close any opened project.
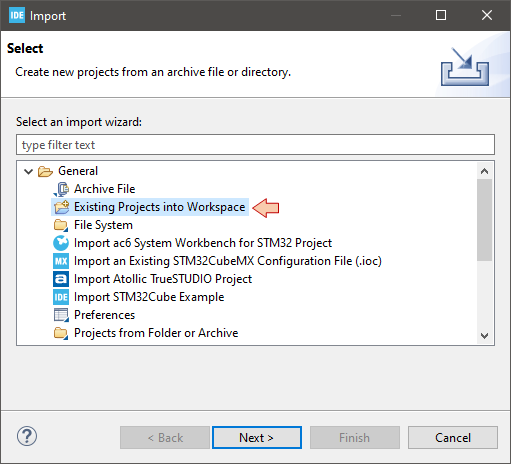
From the IDE main menu File → ![]() Import
Import
Choose Existing Project into Workspace from the General folder and click Next
In the next dialog:
- Put your workspace path as the Select root directory. Use the Browse button if necessary.
- Tick the project you want to import
- Clear other options (we don’t need to copy project as it is already in the workspace folder)
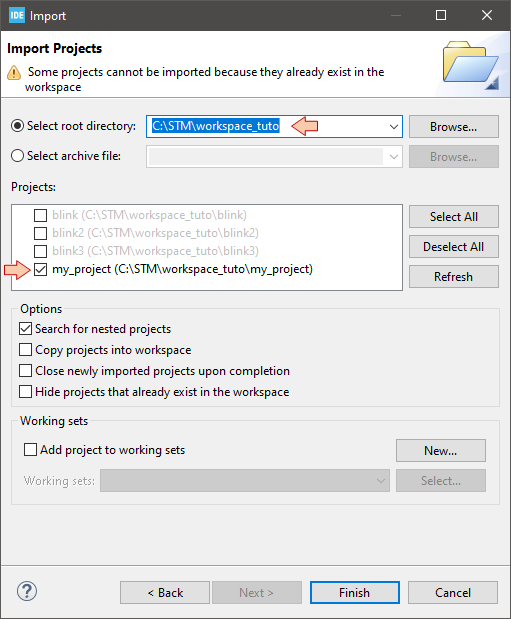
Then click Finish.
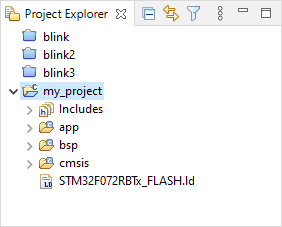
The new project my_project is now displayed in the Eclipse Project Explorer:
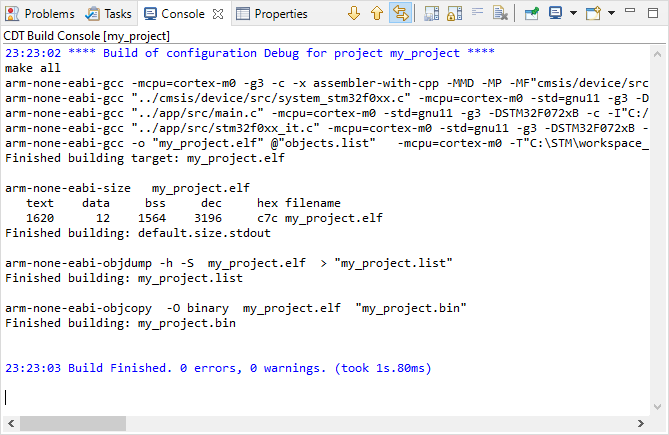
You should be able to build it ![]() without problem since all the build options you have set in the source project have been preserved during the cloning operation:
without problem since all the build options you have set in the source project have been preserved during the cloning operation:
The ![]() Debug Configuration is empty as we did not keep the previous file settings. You'll need to redo that. I'm not covering this here again since you've already done it before, about three times . You should know what to do now.
Debug Configuration is empty as we did not keep the previous file settings. You'll need to redo that. I'm not covering this here again since you've already done it before, about three times . You should know what to do now.
- Log in to post comments