
3.3. UART RX interrupts
1. Using the USART in RX mode
1.1. Setting up the peripheral
So far, we have been using USART2 in TX mode only, to output console messages with my_printf() function. In this tutorial, we want to receive incoming data from the terminal window as well.
Below is our function that initializes USART2. Make sure that both TX and RX mode are enabled (should be already there). Doing so, the PA3 pin is used as the USART2 RX alternate function.
/*
 * BSP_Console_Init()
 * USART2 @ 115200 Full Duplex
 * 1 start - 8-bit - 1 stop
 * TX -> PA2 (AF1)
 * RX -> PA3 (AF1)
 */

void BSP_Console_Init()
{
	// Enable GPIOA clock
	RCC->AHBENR |= RCC_AHBENR_GPIOAEN;

	// Configure PA2 and PA3 as Alternate function
	GPIOA->MODER &= ~(GPIO_MODER_MODER2_Msk | GPIO_MODER_MODER3_Msk);
	GPIOA->MODER |=  (0x02 <<GPIO_MODER_MODER2_Pos) | (0x02 <<GPIO_MODER_MODER3_Pos);

	// Set PA2 and PA3 to AF1 (USART2)
	GPIOA->AFR[0] &= ~(0x0000FF00);
	GPIOA->AFR[0] |=  (0x00001100);

	// Enable USART2 clock
	RCC -> APB1ENR |= RCC_APB1ENR_USART2EN;

	// Clear USART2 configuration (reset state)
	// 8-bit, 1 start, 1 stop, CTS/RTS disabled
	USART2->CR1 = 0x00000000;
	USART2->CR2 = 0x00000000;
	USART2->CR3 = 0x00000000;

	// Select PCLK (APB1) as clock source
	// PCLK -> 48 MHz
	RCC->CFGR3 &= ~RCC_CFGR3_USART2SW_Msk;

	// Baud Rate = 115200
	// With OVER8=0 and Fck=48MHz, USARTDIV =   48E6/115200 = 416.6666
	// BRR = 417 -> Actual BaudRate = 115107.9137 -> 0.08% error
	//
	// With OVER8=1 and Fck=48MHz, USARTDIV = 2*48E6/115200 = 833.3333
	// BRR = 833 -> Actual BaudRate = 115246.0984 -> 0.04% error (better choice)

	USART2->CR1 |= USART_CR1_OVER8;
	USART2->BRR = 833;

	// Enable both Transmitter and Receiver
	USART2->CR1 |= USART_CR1_TE | USART_CR1_RE;

	// Enable USART2
	USART2->CR1 |= USART_CR1_UE;
}
1.2. Understanding USART RX process
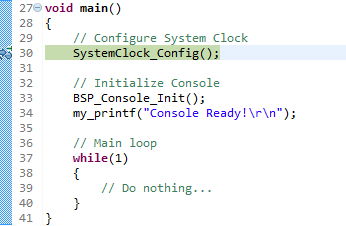
Make the main() function as simple as this:
// Main function
int main()
{
// Configure System Clock
SystemClock_Config();
// Initialize Console
BSP_Console_Init();
my_printf("Console Ready!\r\n");
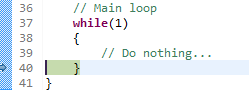
// Main loop
while(1)
{
// Do nothing...
}
}
Then:
Save all

Build the project

Launch a debug session

Open a serial terminal program (Putty) with the correct COM port settings.
Once started, the debugger will stop at the beginning of the main() function, waiting for you to command execution.
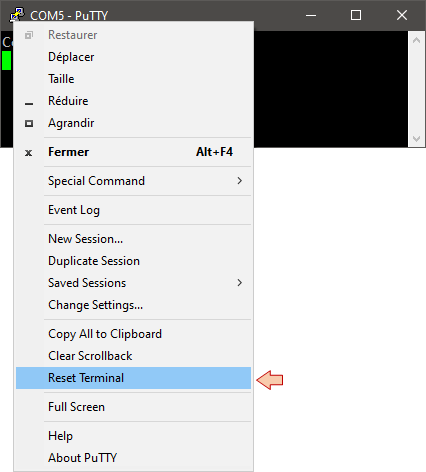
Clean the Putty terminal from previous messages by clicking on the window icon and then Reset Teminal.
Now, start the program execution ![]() for a few seconds, and then press the suspend
for a few seconds, and then press the suspend ![]() button.
button.
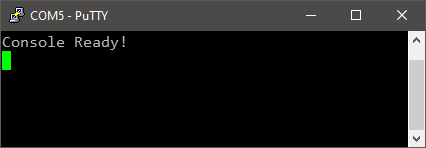
You should see the ”Console Ready!” message, and the program is trapped in your while(1) never ending loop:
In the ![]() SFRs view unfold USART2
SFRs view unfold USART2
Refresh the USART2 register view by running the application for a few more seconds ![]() , then suspend again
, then suspend again ![]() .
.
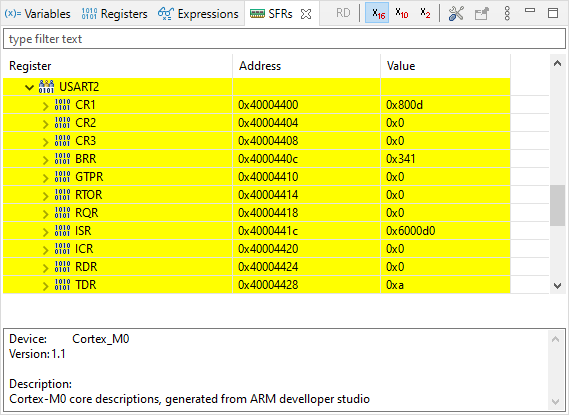
Take a moment to unfold each of the USART2 registers and have a look on the various settings and available information you can gather from these registers. For instance:
CR1, CR2, CR3 are used to configure the behavior of USART2. You should retrieve here what your BSP initialization function does.
ISR reports statut of USART2
RDR is the receive data register
TDR is the transmit data register
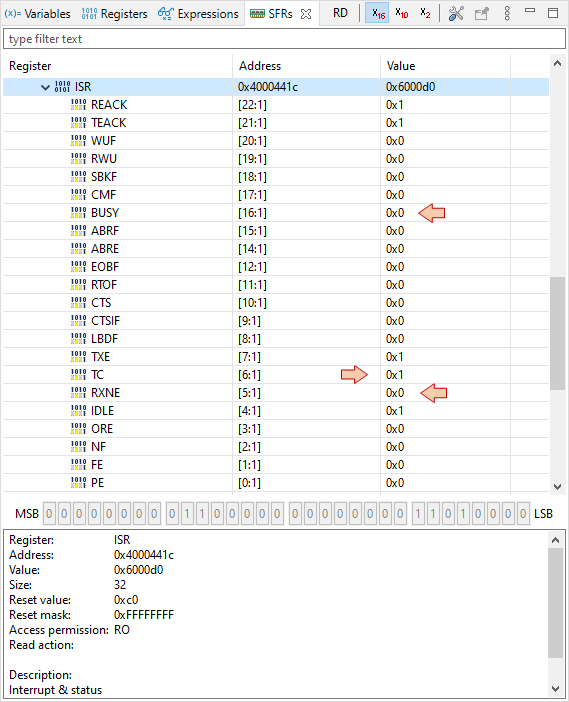
Looking into ISR (Interrupt & Status Register, do not confuse with Interrupt Service Routine) tells us that :
USART2 is currently not busy (BUSY = 0)
The receive data register is empty (RXNE=0)
Last TX is complete (TC = 1)
You can also notice that TDR is loaded with '0x0A' byte, which corresponds to the very last byte we sent in the “Console Ready!\r\n” message (i.e. the ASCII code of newline character ‘\n’).
Now, do EXACTLY what follows:
Press the resume button
 in the debugger
Select the terminal (Putty) window to bring it into focus
Press the ‘a’ key on the computer keyboard (only once). You will see nothing happening in the terminal window, it is normal.
Now, press the suspend
 button in the debugger
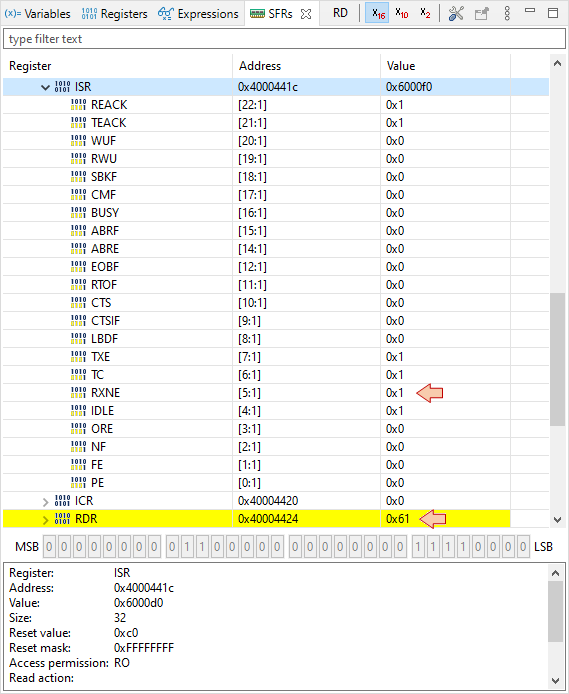
Doing this, you have asked the terminal program (Putty) to send the byte ‘a’ to the MCU on its USART2 RX pin. If you have done the above steps well, you should see some changes in USART2 peripheral registers:
ISR has changed. Unfold it and observe that RXNE (RX Not Empty) bit is now set to ‘1’, which tells us that a data is available in the RDR register.
RDR now contains the byte 0x61, which is the ASCII code of the ‘a’ character (the one you pressed)
Repeat the above steps, but instead of hitting the ‘a’ key at step 3, hit the ‘b’ key (only once). You will see that 0X62 byte has now arrived in the RDR register. You can continue repeating the above steps with different keyboard keys ('b', 'c'), and verify that the last pressed key has always arrived in the RDR register.
If you try to press 2 keys in a row ('d', 'e') on the keyboard from the terminal application (without suspending the program execution in between), you will see that only the first one is stored in RDR register. Moreover, the flag ORE (Overrun error) is set. This bit is set by hardware when the data currently being received cannot be transferred into RDR because it is not empty. If this happens, the RX process will not work anymore until you clear ORE by writing 1 to the ORECF bit, in the ICR register. You can do that from the debugger register view and make sure ORE resets.
You can permanently disable the Overrun error detection by setting the OVRDIS bit in the CR3 register.
This rises an interesting question... Why didn't we get the ORE flag before, since we were not explicitly reading the RDR register in our code during the first experiments? Well that's a side effect of using the debugger. We didn't read RDR, but the debugging process does access to peripheral registers (and the whole memory by the way) each time you reach the suspend button ![]() . It makes the USART peripheral believe that register RDR has been accessed and read although we did no such thing in our code. So be very careful because this a an example of behavior differing between normal execution and execution under debug session. A workaround to this issue is to make use of well placed breakpoints to make sure that sensitive sections of the code can run uninterrupted.
. It makes the USART peripheral believe that register RDR has been accessed and read although we did no such thing in our code. So be very careful because this a an example of behavior differing between normal execution and execution under debug session. A workaround to this issue is to make use of well placed breakpoints to make sure that sensitive sections of the code can run uninterrupted.
Anyway, when you send characters one by one, you can see that RDR only stores the first one (when overrun detection is on) or the last one (when overrun detection is off) being received. Previous characters are lost. USART peripheral is therefore not storing successive incoming bytes. It is your responsibility to read incoming bytes when available, and before a new one arrives and takes place in the RDR register or produces an Overrun error.
Terminate the debug session and edit the main() function:
// Main function
int main()
{
uint8_t rx_byte;
// Configure System Clock
SystemClock_Config();
// Initialize Console
BSP_Console_Init();
my_printf("Console Ready!\r\n");
// Main loop
while(1)
{
// If there is something in USART RDR register
if ( (USART2->ISR & USART_ISR_RXNE) == USART_ISR_RXNE )
{
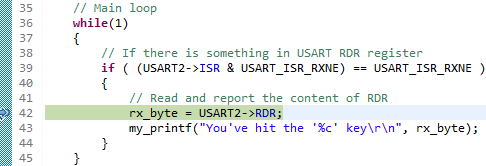
// Read and report the content of RDR
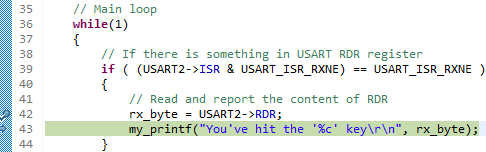
rx_byte = USART2->RDR;
my_printf("You've hit the '%c' key\r\n", rx_byte);
}
}
}
What this example does is pretty obvious. We continuously test (poll) the USART2 RXNE flag. When it is set, we transfer the RDR register content into the rx_byte local variable.
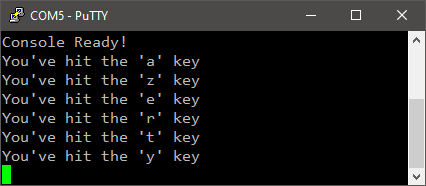
Build the program, flash the target and hit some keyboard keys in the console windows:
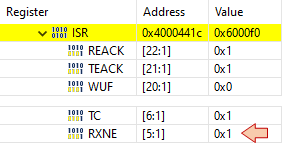
Now, open a debug session and set a breakpoint just before reading the content of RDR.
Then start execution ![]() and use the serial terminal program to send something by hitting a keyboard key. The code should suspend by the breakpoint. Check the value of RXNE from here, it should be set to 1.
and use the serial terminal program to send something by hitting a keyboard key. The code should suspend by the breakpoint. Check the value of RXNE from here, it should be set to 1.
 |  |
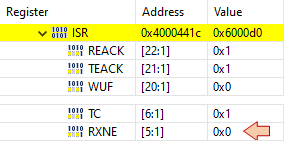
Next, step over ![]() one line (i.e. read the content of RDR). You sould see RXNE being cleared by this action. In conclusion, reading the RDR register automatically resets the RXNE flag. Therefore, there is no need to take care of this register from the application program.
one line (i.e. read the content of RDR). You sould see RXNE being cleared by this action. In conclusion, reading the RDR register automatically resets the RXNE flag. Therefore, there is no need to take care of this register from the application program.
 |  |
 | - - |
The above main() function is just polling data on the USART2 RX register. We already discussed about the drawbacks of the polling approach for the push-button:
In the above example, the CPU is fully busy reading the RXNE flag
If there are some other important tasks to do between RXNE readings, you will likely miss quite a few incoming bytes.
Let's use interruption!
2. Enabling RX interruptions
2.1. USART and NVIC setup
Edit the BSP_Console_Init() function to enable the interrupt upon RXNE event:
...
	// Enable USART2 clock
	RCC -> APB1ENR |= RCC_APB1ENR_USART2EN;

	// Clear USART2 configuration (reset state)
	// 8-bit, 1 start, 1 stop, CTS/RTS disabled
	USART2->CR1 = 0x00000000;
	USART2->CR2 = 0x00000000;
	USART2->CR3 = 0x00000000;

	// Select PCLK (APB1) as clock source
	// PCLK -> 48 MHz
	RCC->CFGR3 &= ~RCC_CFGR3_USART2SW_Msk;

	// Baud Rate = 115200
	// With OVER8=0 and Fck=48MHz, USARTDIV =   48E6/115200 = 416.6666
	// BRR = 417 -> Actual BaudRate = 115107.9137 -> 0.08% error
	//
	// With OVER8=1 and Fck=48MHz, USARTDIV = 2*48E6/115200 = 833.3333
	// BRR = 833 -> Actual BaudRate = 115246.0984 -> 0.04% error (better choice)

	USART2->CR1 |= USART_CR1_OVER8;
	USART2->BRR = 833;

	// Enable both Transmitter and Receiver
	USART2->CR1 |= USART_CR1_TE | USART_CR1_RE;

	// Enable interrupt on RXNE event
	USART2->CR1 |= USART_CR1_RXNEIE;

	// Enable USART2
	USART2->CR1 |= USART_CR1_UE;
...
Next enable USART2 interrupt to propagate thru NVIC controller with priority 1 (this is done in BSP_NVIC_Init() function):
...
	// Set priority level 1 for USART2 interrupt
	NVIC_SetPriority(USART2_IRQn, 1);

	// Enable USART2 interrupts
	NVIC_EnableIRQ(USART2_IRQn);
...
2.2. Basic USART RX interrupt handler
Now, write a simple interrupt handler:
/*
 * This function handles USART2 interrupts
 */

extern uint8_t	console_rx_byte;
extern uint8_t	console_rx_irq;

void USART2_IRQHandler()
{
	// Test for RXNE pending interrupt
	if ((USART2->ISR & USART_ISR_RXNE) == USART_ISR_RXNE)
	{
		// RXNE flags automatically clears when reading RDR.

		// Store incoming byte
		console_rx_byte = USART2->RDR;
		console_rx_irq = 1;
	}
}
Note that both console_rx_byte and console_rx_irq variables must be declared as global variables to be available both from the main() function and from the USART2_IRQHandler() function.
2.3. Testing the USART RX interrupt
Try the following main() function:
// Global variables
uint8_t      button_irq = 0;
uint8_t      timebase_irq = 0;
uint8_t	     console_rx_byte;
uint8_t	     console_rx_irq = 0;

// Main function
int main()
{
	// Configure System Clock
	SystemClock_Config();

	// Initialize Button pin
	BSP_PB_Init();

	// Initialize Console
	BSP_Console_Init();
	my_printf("Console Ready!\r\n");

	// Initialize timebase
	BSP_TIMER_Timebase_Init();

	// Initialize NVIC
	BSP_NVIC_Init();

	// Main loop
	while(1)
	{
		// Process button upon interrupt
		if (button_irq == 1)
		{
			my_printf("#");
			button_irq = 0;
		}

		// Process console incoming byte upon interrupt
		if (console_rx_irq == 1)
		{
			my_printf("%c", console_rx_byte);
			console_rx_irq = 0;
		}

		// Process main task upon timebase interrupt
		if (timebase_irq == 1)
		{
			my_printf(".");
			timebase_irq = 0;
		}
	}
}
Build the project and flash the target. Open the console and hit some keyboard keys. You may also and play with the user button:
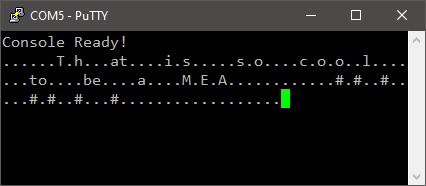
It seems to work very well. Neither button or keyboard action is lost, and the task is executed safely every 200ms.
Actually, the risk of loosing console events still exists…
| - - |
3. Buffering incoming bytes
In the previous code, the main task is fired every 200ms, but it completes quite fast. What would append if more that one USART interrupt occur by the time the main task executes?
To bring that problem into light, let us tune our timings a little bit...
First, change the TIM6 timebase setting for a 1s period between update interruptions:
...
	// Set TIM6 prescaler
	// Fck = 48MHz -> /48000 = 1kHz counting frequency
	TIM6->PSC = (uint16_t) 48000 -1;

	// Set TIM6 auto-reload register for 1s
	TIM6->ARR = (uint16_t) 1000 -1;
...
Next, add time for the execution of the main task. We can use our simple delay function, and set the delay so that the main task extends most of the 1s loop period of (say 900ms):
...
		// Process main task upon timebase interrupt
		if (timebase_irq == 1)
		{
			my_printf(".");
			timebase_irq = 0;
			BSP_DELAY_ms(900);
		}
...
Save all, build and run the application. You should get a ‘.’ Printing every second.
Now try hitting several keys quickly one after each other. Below is a result of hitting ‘a’, ‘z’, ‘e’, ‘r’, ‘t’, ‘y’ quite fast:
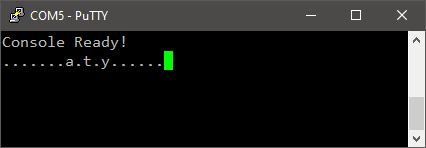
You can see that characters are missing…
Well, the USART interrupt process guaranties that any byte arriving in the USART2 RDR register is immediately transferred into our console_rx_byte variable. But what is preventing console_rx_byte to be overwritten by a new incoming byte before it is printed out?
Hmm… nothing!
To overcome the loss of bytes, we have to implement an input buffer able to store more than one incoming byte until the main() function finds time to process all the received bytes.
First, let us change the rx_byte variable into an array of 10 bytes:
...
	uint8_t	  console_rx_byte[10];
...
Next, we can use the console_rx_irq variable as an index for writing in the console_rx_byte array:
/*
 * This function handles USART2 interrupts
 */

extern uint8_t	console_rx_byte[10];
extern uint8_t	console_rx_irq;

void USART2_IRQHandler()
{
	// Test for RXNE pending interrupt
	if ((USART2->ISR & USART_ISR_RXNE) == USART_ISR_RXNE)
	{
		// RXNE flags automatically clears when reading RDR.

		// Store incoming byte
		console_rx_byte[console_rx_irq] = USART2->RDR;
		console_rx_irq++;
	}
}
As a result, the handler increments the console_rx_irq variable each time a new byte fills the buffer. Resetting console_rx_irq to zero is left to the main() function when received bytes have been correctly processed (i.e. printed out in our case).
The main() function can now empty the buffer between two main task executions:
// Main function
int main()
{
	uint8_t *prx_buffer;

	// Configure System Clock
	SystemClock_Config();

	// Initialize Button pin
	BSP_PB_Init();

	// Initialize Console
	BSP_Console_Init();
	my_printf("Console Ready!\r\n");

	// Initialize timebase
	BSP_TIMER_Timebase_Init();

	// Initialize NVIC
	BSP_NVIC_Init();

	// Main loop
	while(1)
	{
		// Process button upon interrupt
		if (button_irq == 1)
		{
			my_printf("#");
			button_irq = 0;
		}

		// Set pointer at the beginning of UART RX buffer
		prx_buffer = console_rx_byte;

		// Process console incoming byte upon interrupt
		while (console_rx_irq > 0)
		{
			my_printf("%c", *prx_buffer);
			prx_buffer++;
			console_rx_irq --;
		}

		// Process main task upon timebase interrupt
		if (timebase_irq == 1)
		{
			my_printf(".");
			timebase_irq = 0;
			BSP_DELAY_ms(900);
		}
	}
}
If you’re afraid of pointers, you may use an array index the same way…
Build the project and flash the target. Open the console and hit some keyboard keys as fast as you can:
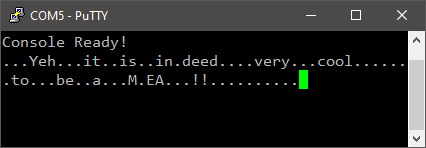
No incoming byte is lost!
Note that the size of the buffer depends on application. In the above example, we can see that a maximum of 4 bytes (you can get more if you are fast) are stored in the buffer before it is printed out. It is safe to slightly oversize the buffer.
| - - |
4. Summary
In this tutorial, you have learned how to receive bytes from USART peripheral using both polling and interrupt based methods.
Note that in this example, incoming data rate is very slow because it relies on human hitting keys on a keyboard. In many applications, you will get serial data from another IC (a sensor for instance) with a continuous high rate flow of incoming bytes. Correctly buffering these incoming bytes is therefore crucial.
If RX line is very busy, working with interruptions might still not be a good idea. Because interrupts will occur very often, the important tasks will be disturbed very often (even for short ISR).
That’s where DMA controller comes into the game. See you next tutorial!
- Log in to post comments