
5.3. Pre-compiled static library
Pre-compiled libraries are very useful if you want to provide users with functions while keeping the implementation source code secret.
In computer science, a static library or statically-linked library is a set of routines, external functions and variables which are resolved in a caller at compile-time and copied into a target application by a compiler, linker, or binder, producing an object file and a stand-alone executable. This executable and the process of compiling it are both known as a static build of the program. Historically, libraries could only be static. Static libraries are either merged with other static libraries and object files during building/linking to form a single executable or loaded at run-time into the address space of their corresponding executable at a static memory offset determined at compile-time/link-time. https://en.wikipedia.org/wiki/Static_library
1. Creating the Library
A library is cooked in the context of a dedicated project so that for this tutorial, we're not using the usual 'my_project' project. You can close it for now.
From the main menu, select:
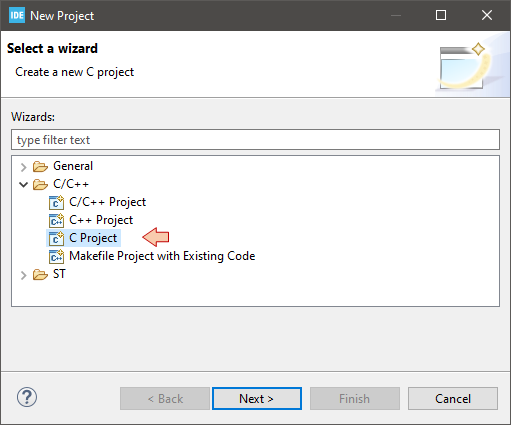
File→New→![]() Project
Project
In the New Project dialog, choose C/C++ → C Project, then click Next.
Choose a name for your library (e.g. 'pomadlib'). Select Static Library→Empty Project as project type and MCU ARM GCC as the toolchain. Click Next.
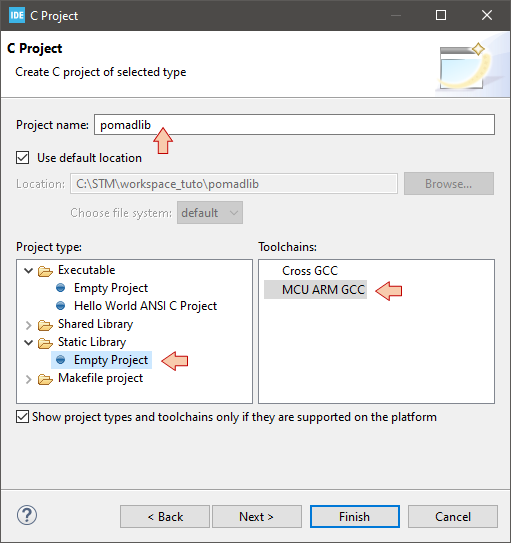
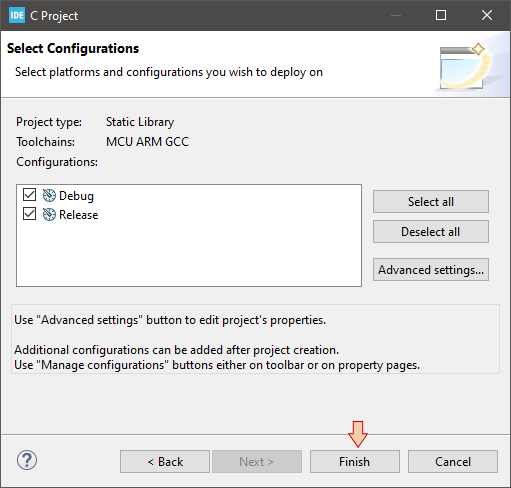
Click Finish.
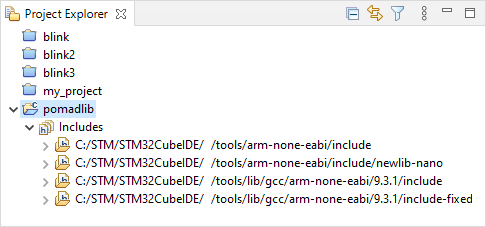
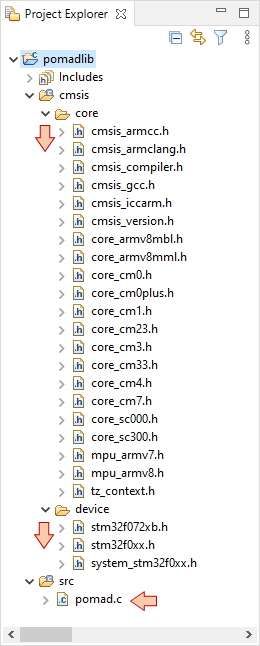
Your workspace now includes a new project 'pomadlib' with a pretty empty structure:
Using the usual menu entries (![]() ,
, ![]() ), build-up a minimal project structure including:
), build-up a minimal project structure including:
An empty (for now) source file 'pomad.c' under a src\ source folder
A cmsis\ source folder with a minimal set of useful headers:
Core headers under cmsis\core\
Device headers under cmsis\device\
You can copy/paste CMSIS files from the 'my_project' folder to the 'pomadlib' folders.
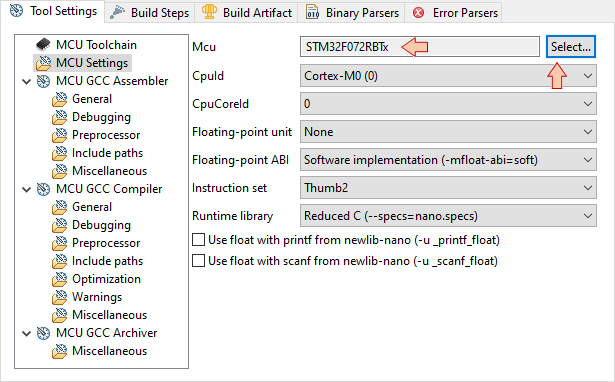
Edit the project properties and under the C/C++ Build → Settings category select the proper MCU and then Apply changes.
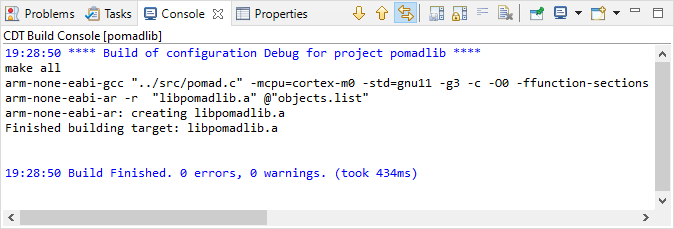
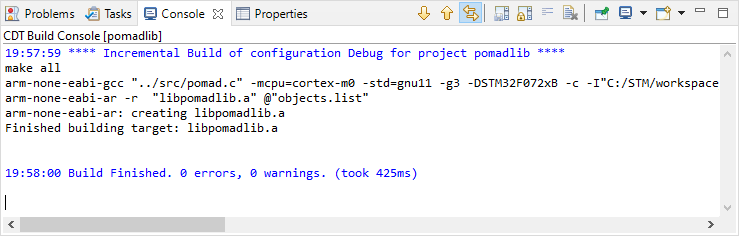
A this step, you may already try and reach the build ![]() button. If everything goes well, you'll get a clean build report:
button. If everything goes well, you'll get a clean build report:
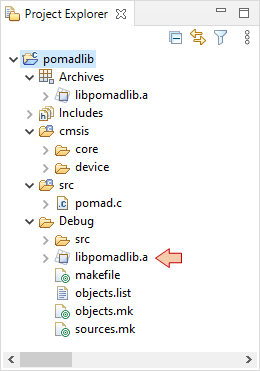
Note that a new Debug\ folder has been created together with the compiled library 'libpomadlib.a':
So far, the library is pretty useless, so let us write a basic function.
First, edit the build setting (project properties) :
Define the STM32F072xB symbol in the C compiler→Symbols category

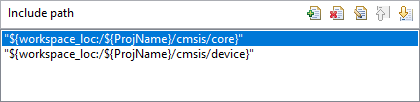
Add Include path to the C compiler→Directories category
/cmsis/core
/cmsis/device
Then edit the pomad.c source file. Let-us write a simple demo function that computes the cumulative sum of n bytes, the latter being provided by means of a pointer:
/*
 * pomad.c
 *
 *  Created on: 30 mars 2020
 *      Author: Laurent
 */

#include "stm32f0xx.h"

uint16_t pomad_csum(uint8_t* byte_array, uint8_t n)
{
	uint8_t 	i;	// Loop counter
	uint16_t	csum;	// Cumulative sum

	csum = 0;

	for (i=0; i<n; i++)
	{
		csum += byte_array[i];
	}

	return csum;
}
Build the project ![]() and make sure there are no warnings or errors.
and make sure there are no warnings or errors.
The libpomadlib.a file is now ready for use in another project. Yet, you have to provide future users with information regarding available functions in the library, and how to use it. Remember that the source code will not be available. Moreover, users will have to declare functions before use, as for any normal situation. You therefore need to provide a well commented header file.
Open a text editor (eg. notepad++) and edit the header file (pomad.h) for your library:
/*
 * pomad.h
 *
 *  Created on: 31 mars 2020
 *      Author: Laurent
 */

#ifndef POMAD_H_
#define POMAD_H_

/*
 * Compute the cumulative sum of n bytes in a array
 *
 * Parameters:
 * - pointer to the byte array
 * - 8-bit number of bytes to sum up (max 255)
 *
 * Returns
 * - The 16-bit cumulative sum
 */

uint16_t pomad_csum(uint8_t* byte_array, uint8_t n);

#endif /* POMAD_H_ */
The compiled library is now ready for distribution. You only need to provide:
The header file pomad.h
The compiled implementation libpomadlib.a
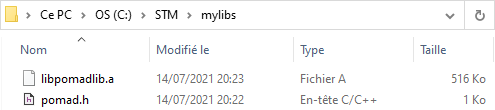
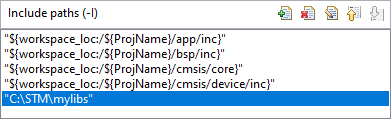
You can save or copy those two files in some location on your file system for sharing among several projects. For instance, I created a C:\STM\mylibs\ folder on the same level as workspaces:
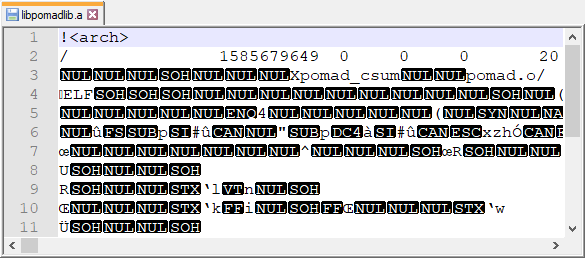
If you like, you can try to open the libpomadlib.a file with a text editor. You would see that your precious intellectual property is safely hidden!
2. Using the Library
Close the 'pomadlib' library project and open the now usual 'my_project' tutorial project. Time has come to sum-up some bytes...
Open the project properties and visit the C/C++ Build → Settings category.
In the MCU GCC Compiler→Include paths section, provide a path to your library. This actually only helps finding the library header (pomad.h):
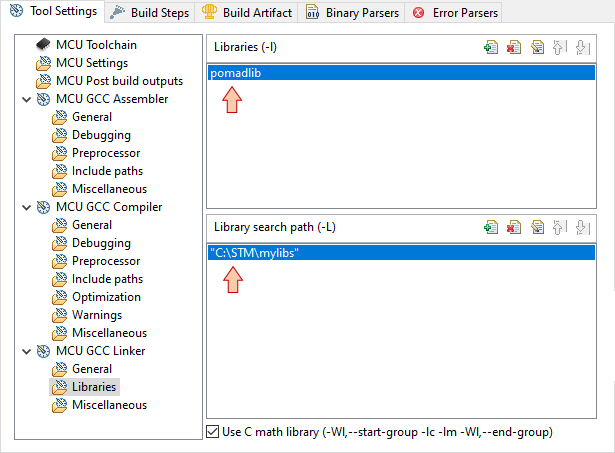
In the MCU GCC Linker→Libraries section, provide the library name you want to use, without the 'lib' prefix, without the '.a' extension and browse for the path. This is where the library gets glued to the project, enabling the linking of your already compiled functions together with the rest of the project.
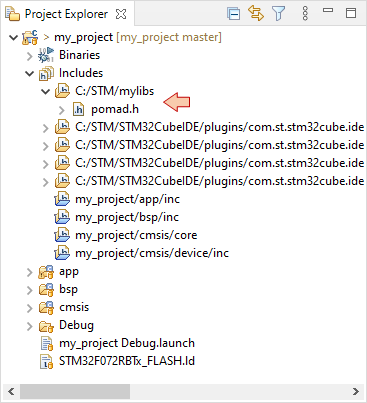
Apply these changes and then close the project properties dialog. Verify that the project explorer displays the 'pomad.h' header in the Includes category:
That's it, you can now use the library functions in your own project:
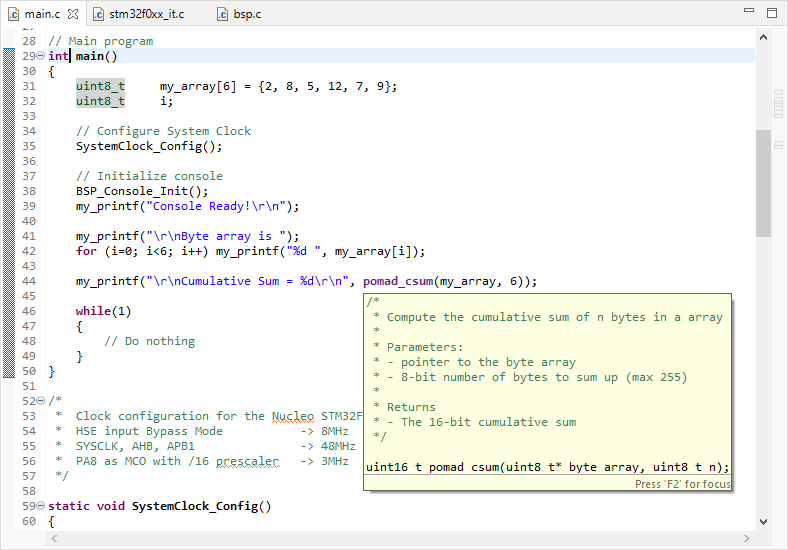
Edit the main() function as follows:
#include "stm32f0xx.h"
#include "main.h"
#include "bsp.h"
// Include library header
#include "pomad.h"
// Static functions
static void SystemClock_Config (void);
// Global variables
...
// Main program
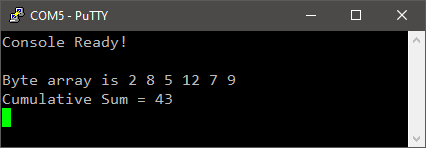
int main()
{
uint8_t my_array[6] = {2, 8, 5, 12, 7, 9};
uint8_t i;
// Configure System Clock
SystemClock_Config();
// Initialize console
BSP_Console_Init();
my_printf("Console Ready!\r\n");
my_printf("\r\nByte array is ");
for (i=0; i<6; i++) my_printf("%d ", my_array[i]);
my_printf("\r\nCumulative Sum = %d\r\n", pomad_csum(my_array, 6));
while(1)
{
// Do nothing
}
}
By the way, look at the editor syntax coloring. Your library function is recognized just like any other function from C standard libraries. Hover the mouse over it and you'll get the header information:
Build ![]() and run
and run ![]() the project:
the project:
That's cool stuff! Now you can provide others with your functions without giving away the source code!
3. Final thoughts
Remember that pre-compiled means... compiled! Because we selected a target before building the library, it should be re-compiled for use with another target device. The function in our example does not use any hardware peripheral so that it may be suitable with a wide range of MCUs. Yet, even for pure data processing functions, if you want your library to cover different targets, you'll need to provide various builds, including for instance the FPU use cases, or different optimization levels.
In the library cooking project, we have nothing like startup code and software entry point (i.e. main() function) that permits in-circuit debugging. A good idea would be to develop library functions within an executable project, do extensive debug, and then package validated functions into a library project.
- Log in to post comments